I did it! I did my first fecal exam. It’s something I’d been thinking about for a while. I figured it would not take long for the equipment to pay for itself with the number of goats I have. I looked at quite a few websites and most of the directions are really similar. Here’s how I did it, and it worked well.
Supplies
You need a microscope. That’s the thing that really had me nervous because my eyes are not great. I was afraid to buy one and then not be able to see. Luckily, I know some science people and I managed to borrow one.

The article I read recommended a power of 40x, but the one I used was 32x. It worked well. I will certainly be getting one for myself. I’ll probably get it from the company I ordered other supplies from, the Carolina Biological Supply Co. You wouldn’t have to order actual science supplies if you are creative and can find similar substitutes. You need a test tube that will hold about 12mL (these are 15), something to hold the test tube, microscope slides and slip covers.

You’ll also need a couple of small containers (I used 1/4 pint jelly jars), a pipette or eye dropper, some cheese cloth (Don’t use the coffee filter you see below because it doesn’t work. You can use a tea strainer.), and an old spoon (I used a plastic one, but you could also use a popsicle stick).

Before you can start, you need to make a float solution.
Making a Float Solution
This is very easy to do. I made mine in a regular quart jar. Fill it about half full with warm tap water.

To the water add 1/4 cup of Epsom salts.

Stir until all the salts have dissolved.

You continue adding 1/4 of a cup of salts and mixing until you can’t get the last little bit to dissolve. You’ll see a few crystals left in the bottom of the jar.

Let the solution sit overnight. It will finish dissolving the last few crystals, and you’ll have a saturated solution of water and Epsom salts. You’re ready to do your exam.
The Exam
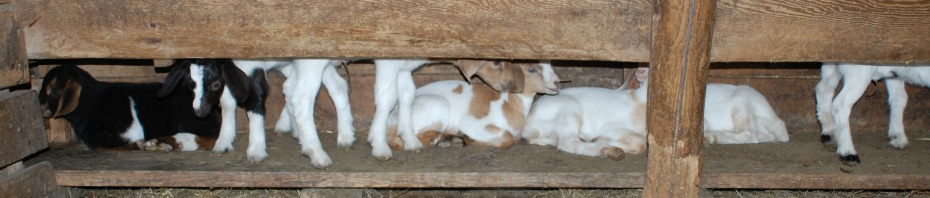
First thing is to gather a fecal sample. I started with Harley.

Aren’t we glad goats make those wonderful berries?

Place the pellets in one of the jars. You only need about four or five. If you have a goat with diarrhea, you can just get a handful in your glove. If you aren’t immediately doing the exam, you can turn the glove inside out when you take it off and cut the finger to squeeze it into the container when you’re ready.

Add about 1/4 cup of the float solution to the jar.

Use your spoon or popsicle stick and smash the berries up.

This is the only part that even looks gross.

Cover the other jar with cheesecloth. You can use a rubber band to hold it.

Strain the mixture through the cheese cloth. It will leave you with a weak tea looking liquid.

Next, use the pipette or eye dropper to draw some of the mixture out of the jar.

Use the pipette to fill the test tube.

Keep filling until the liquid bubbles above the top of the test tube.

Then place the cover slip over the top of the solution and let it sit for about ten minutes.

After it has had time for any eggs to rise to the top, take the slip cover and place it onto the slide.

You might have to use your finger and press gently to get rid of any air bubbles. Then you’re ready to put the slide under the microscope and see what you find.

In my first sample, I was lucky. I actually found one coccidia egg and four or five round worm eggs. It was enough to let me know that I did it correctly, but not enough to make me worry about my pretty Harley girl.

You can use a chart to identify anything you find. The one I used was created by Intervet, the makers of Panacur and Safe-Guard. They also have different directions for doing the worm check.

I printed it out and laminated it. One of the other great sites I visited was The Biology of the Goat. It has directions for doing the fecal exam as well as other great information.
Cleanup isn’t too bad. I just started by swishing the cheesecloth in the toilet and dumping everything in the toilet before washing with dish soap and hot water. Really the whole process was way easier than changing a dirty diaper.
I’m still in no way an expert, but I’m guessing that I’ll be getting a lot of practice in the weeks to come.


one down, 66 to go… or something like that! 🙂 the part i found most interesting is that you’re looking for eggs which must float to the top of the solution. learned something new! 🙂
It’s amazing how much I’ve learned since goats came into my life. I’m sure there’s some I would have preferred to live in ignorance of.
I have been seriously considering getting a couple of goats. You just talked me out of it! 🙂 The part about swishing the cheesecloth in the toilet did it for me. I remember changing my little brother’s cloth diaper and swishing it out in the toilet when I was a kid…. and then dropping it in the stinky diaper pail. Gak! I can’t believe that I did this without throwing a fit!!!
I would hate to think you were not going to get goats because of me. They are so much fun. The only reason I’m doing this is because I have 61 goats on my farm right now. With one or two, it would be silly to do it yourself. With a good worming program, you’d be very likely not to have to worry about it. If you do need it done, any vet can do the test. Really, you should not let this deter you from getting goats.
Okay. You changed my mind 🙂
So glad. I’d have felt guilty forever if I hadn’t.
Wow! That’s so cool! Fias Co Farm has a really good guide to it as well if you want to check it out. Good luck with your new project!
It’s been a while since I’ve been there. I know that they have a lot of great information! This has already been helpful.
I’m impressed! You can add “scientist” to your long list of accomplishments! Your goats are so lucky to have you as their human (and you can tell Millie I said so) 🙂
I’m flattered. This is really out of necessity. I have to admit that I do love science. It’s kind of nice to be working with the science teachers this fall.
The things we learn from blogs! You are a star!
Well, necessity is the mother of invention, and I tend to simply forge ahead and try things.
You go Teresa! Wow,you are quite the goat farmer and saving yourself lots of bucks.
It will really let me test more frequently so that my goats will have better care.
Hmm.
Now see, I would have thought that you’d just smear a berry on a slide.
Really interesting. And much gratitude to you for being our fecal pioneer! 😉
“A good worming program.” Pray tell……….IS there one? lol
I’ve not worried so much about poo since I got Darla.
I do enjoy going to Fias Co. Some very good info.
Thanks for walking us through this. Looking forward to following what comes next in your learning curve!
Glad to share the information. I swear my girls want me to know everything there is to know about goats. I’m not sure there is a good worming program because everything changes on me just when I think I’ve got it down.
Congratulations, Teresa. This is quite the task, but I’m sure it will pay for itself in short order. It’s amazing what one can accomplish when the mind is set on doing!
It is much faster and convenient than trying to get a sample to the vet for them to do the test. Bless the people that make morning runs to the vets with a bag of poo in their purse. I’m sure they’re glad I’m doing it myself now.
Very interesting! Thanks for showing step-by-step how it’s done! Glad Harley got an “okay!”
It really was easier than I thought it would be. I’m sure I’ll keep learning as I go, but it isn’t too hard.
Congratulations Teresa! I have found that doing fecals has been really helpful in the parasite management of my flock. I use the Paracount-EPG kit which makes it super easy.
I’ll have to look into that. I’ve not heard of it. Thanks.
I am beyond impressed! Really! Thanks for posting this its was very, very good niformation!
I know how I’ve struggled to find information. Hopefully, anything like this I can post will help somebody.
Hmm, so that’s how you do a fecal exam. It’s actually a lot cleaner (but still icky) than I had imagined. Being a city girl, I thought you had to smear fecal matter onto a slide and then look at it for worms through the microscope. This method is definitely less disgusting and sounds like a heck of a lot easier to clean 🙂
It really was easy, and you are actually looking for the eggs, not even worms.
Thank you fornyour detailed info…I have Boer goats and love them…its been a challenge to learn about them since we are just tapping into the meds used. If you are going to raise them its a commitment you must have..dont just throw them into a pasture ….
Sadly many people don’t understand the work involved with providing them proper care. I do hope this helped. 🙂
How much do you think one of those microscopes would cost? I don’t exactly want to spend a fortune on something like that even though it would be very useful. I think my goats may be a little wormy right now, but I would like to know for sure before going spend a lot of money on the vet.
I found I could buy a nice microscope for what it would have cost me to do fecals through the vet for one year. Mine is more fancy than you would need. It’s been enough years, I don’t even remember what it cost.
Hi Teresa, I am in the initial stage of having my own goat farm and thought of doing some research on it. Being a researcher (microbiologist) by profession, got me deep into literature search. This is what we usually do before carrying out any research on a specific topic. My search on the web by chance displayed your domain and I was fortunate to go through your blog.
I found the contents of the blog extremely informative and useful. What I understood after going through your site is your determination and dedication towards goat rearing and your experience over the years. I liked your way of presentation and moreover your lighter and natural way of dealing with goats (I mean not being cruel). Thank you for sharing the info on the web.
Examination of goat fecal pellets under the microscope for the presence of parasites was something that I found interesting to note. I would say that the procedure for the preparation of a fecal suspension can be very simple and more meaningful if you could do it as below
1) Approximately add a gram of fecal pellets to 99 ml of Epsom salt solution or phosphate buffered saline (this will give the dilution 10 to the power of 2).
2) Mix and allow the slurry to settle.
3) Pipette 0.1ml of the clear suspension onto a microscope slide.
4) Place a coverslip on top of the drop.
5) Observer under a light microscope at 400x magnification (10x of ocular or eyepiece lens and 40x of objective lens = 400x).
(Note: The higher the magnification used the larger the size of particles/microbes you see under the microscope. Using a 100x oil immersion objective and 15x ocular lens would give the maximum magnification (1500x) that any light microscope could support).
At the magnification of 400x and 1500x you can also see the bacterial cells with better visibility at the latter magnification besides the parasites. If you use a haemocytometer for observing cells under the microscope the number of counts can be calculated based on the dilution that we prepared, the volume of sample pipetted for counting and the number of field counted. Advantage is that depending on the number of cells the dosage of antibiotic to be given can be calculated.
I hope the provided info will be useful to you. Please feel free to contact me in case if you have any other clarifications.
I have had a very challenging year so far, lost two kids at 3 and 4 months of age. Then had a twin buck get a high fever at 5 weeks, back to vet at 6 weeks of age. The fever kept coming back. Vet finally did a fecal, it was positive. So we treated all 4 remaining kids. It took a total of 6 weeks to clear all kids of coccidiosis. This was all from March – July 2017. Wish I knew you could do your own fecal test. I will be getting my own supplies and learning. I really appreciate your wisdom in sharing your knowledge for others to learn a simple fecal test.
It isn’t as precise as some, but it will give you what you need. Hope things get better for you.
hi im from mozambique and i currently farming pig and cows and i would like to farm goat as well.anyway many thanks teresa for your blog i find it very interesting . God bless
I use 2 plastic bathroom cups ( you get a pack at the dollar tree) 1 to put 3-4 berries and 30 ml of float solution sit 5 mins. Then use a metal tea strainer over the 2nd cup or the 1st cup into the 2nd cup discard waste with an rinsed old syring draw up the strained liquid and put into a Mc Masters slide view eggs under microscope.
Throw everything away and rinse in hot water the tea strainer and slide.